

Instance Creation
VPS's are called "Instances" on Incus. There are two types of Instances: "Containers" (CTs) and "Virtual Machines" (VMs).
Containers are virtualized via LXC and Virtual Machines are virtualized with QEMU. In both cases Incus handles the setup, configuration and management. But please note: Aventurin{e} 6110R does NOT allow you to create VMs at this time. There is a yet unresolved issue between Incus and the QEMU available to us on AlmaLinux 9 which prevents us from offering the ability to manage VMs. We will add this feature once the problem has been resolved.
To create an Instance click on the "Add" button under "Incus Management" / "Instances":

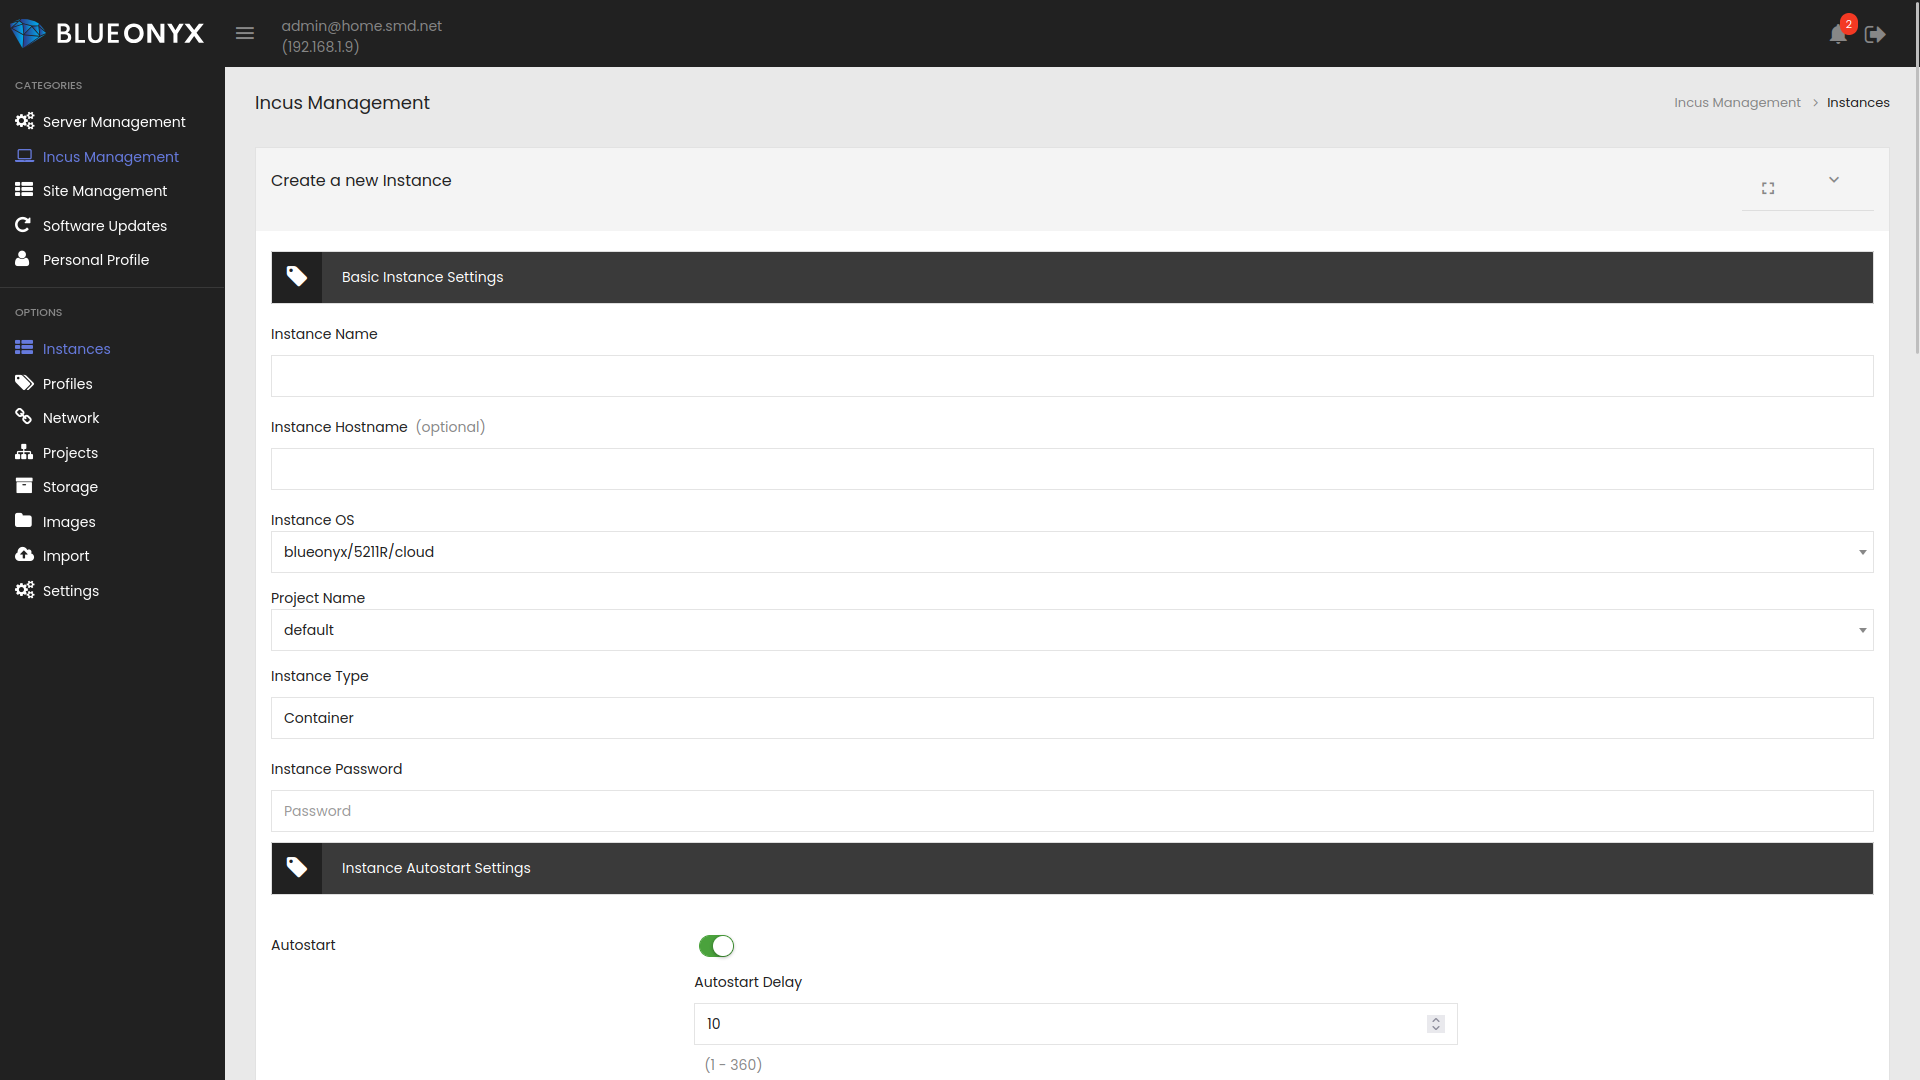
That will present you with a GUI page that allows you to configure the settings of the new Instance that you want to create:
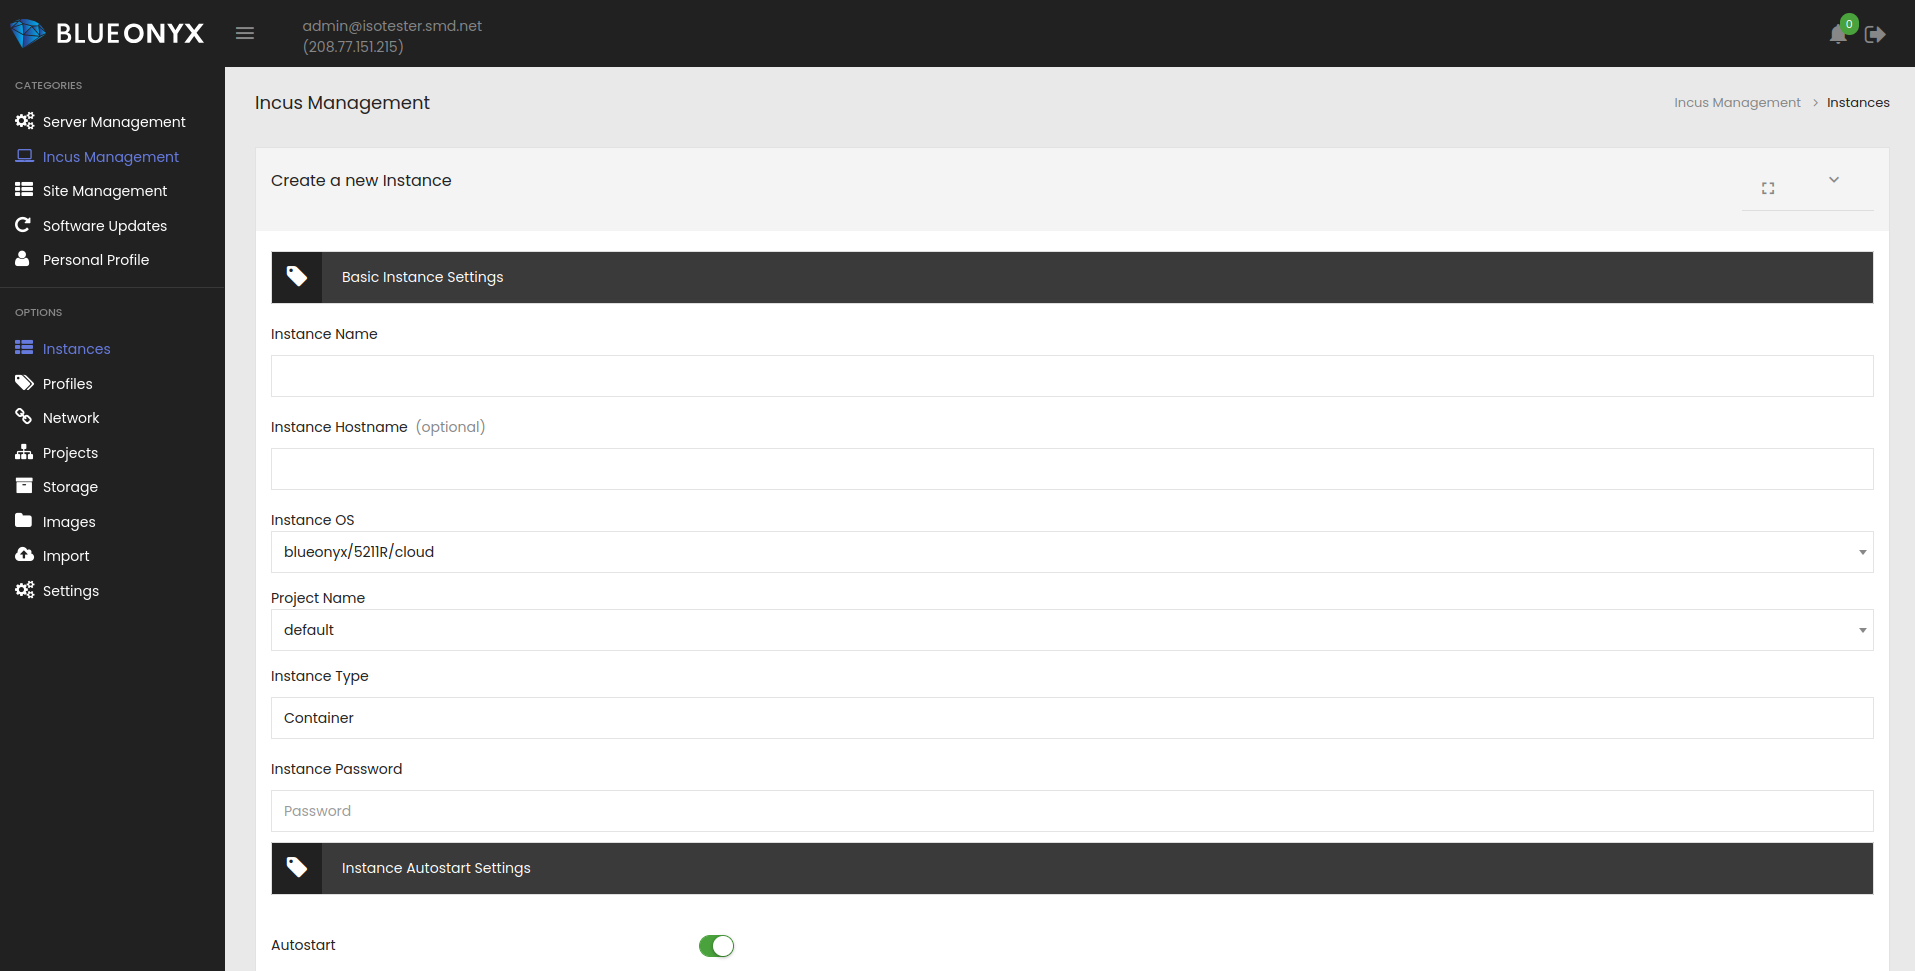
Instance Name: That is a unique identifier that you can assign to the Instance. Think of the old "VPSID" under OpenVZ. Or a shorthand you will use to quickly access the instance in the future.
Instance Hostname: The FQDN of the instance. You can leave this empty. But when you specify an FQDN here, the GUI will try to set the host- and domain-name of the instance accordingly.
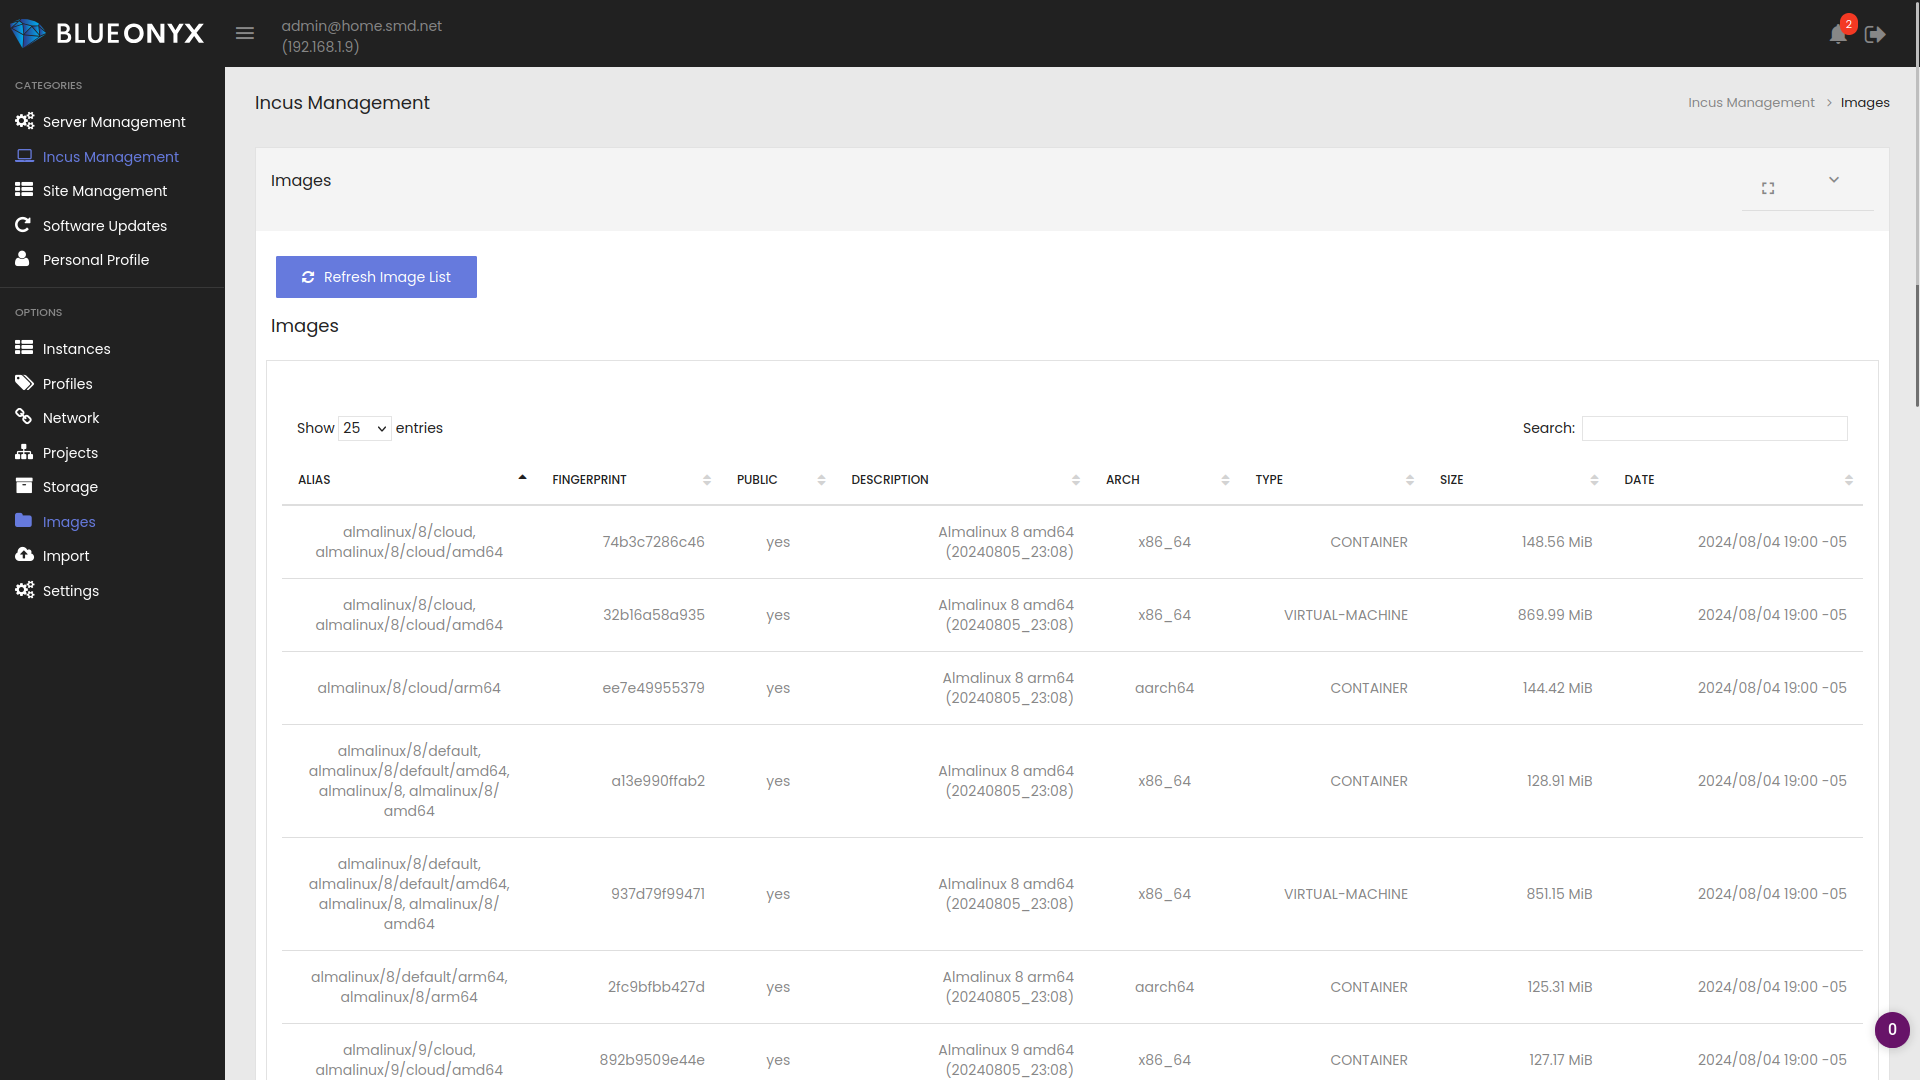
Instance OS: This pulldown allows you to select the OS of the instance. There are a lot of options available and you can use any one of them that suits your needs. Please note that many listed images come in two flavors at least: "cloud" and "regular". Images with "cloud" in their name have the service "cloud-init" installed, which helps with the auto-provisioning of network settings, hostname, DNS and other configuration items. Images with "regular" in their name do not have these provisions and may need to be configured manually after they have been created and started. Aventurin{e} 6110R will try its best to even properly configure the network of "regular" images by writing out an "eth0" network configuration that should work. But your mileage might wary. Our recommendation: Use the "cloud" images for best possible results.
Project Name: Incus has a project management included which allows to group instances into "projects" and to assign those "projects" to individual users. We partially use this for the reseller management. If you create a "Server Administrator" in the BlueOnyx 5211R GUI and assign him (under "Expert Settings") the right "Manage Incus Instances", then you can create an Incus Project with the name of that Server Administrator and can assign one or more Instance(s) to him for management. That user will then be able to use the BlueOnyx/Aventurin{e} GUI to manage only the instances that are assigned to him. Any instances NOT owned by any particular Server Administrator are in the "default" project.
Instance Type: Container. As explained in the introduction: At this time we only support instances of type "Container".
Instance Password: Can be used to automatically set the "root" password of an instance during creation of the instance.
Instance Autostart Settings:
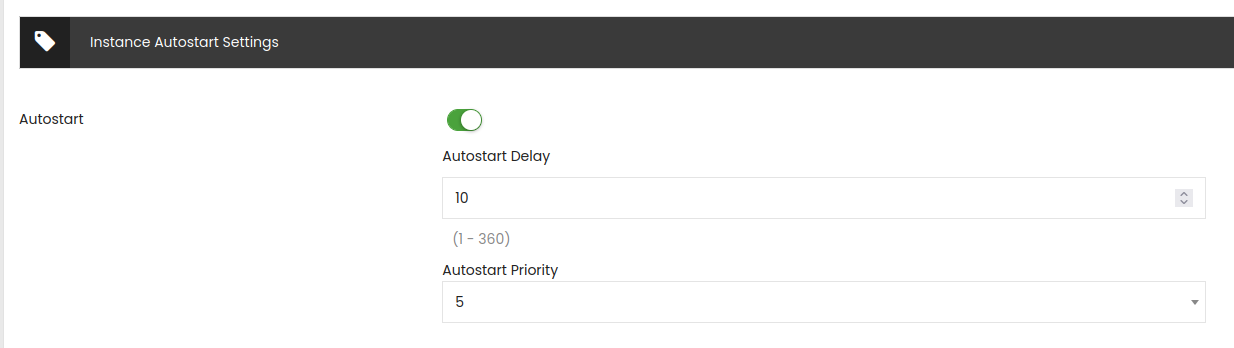
This allows you to configure with which priority this instance is started. That may be of particular interest when you have many instances and ever need to reboot your virtualization node. In that case you can give instances of greater infrastructural importance a higher priority, so that they start first.
Instance Security Settings:

Elevate Instance Privileges: You should not touch this with a 10 foot pole. As long as this is unticked, the instance will run with limited privileges. Which is considered the most secure way. You can (but should not!) elevate the instance privileges, but then all bets are off and you might risk the security and integrity of your virtualization node.
Instance Delete Protection: If this is enabled, then the instance cannot be deleted. Neither from the GUI, nor the command line or the API. This is a good method to prevent some "fat finger" accidents and should be considered for important instances.
Instance Resource Settings:
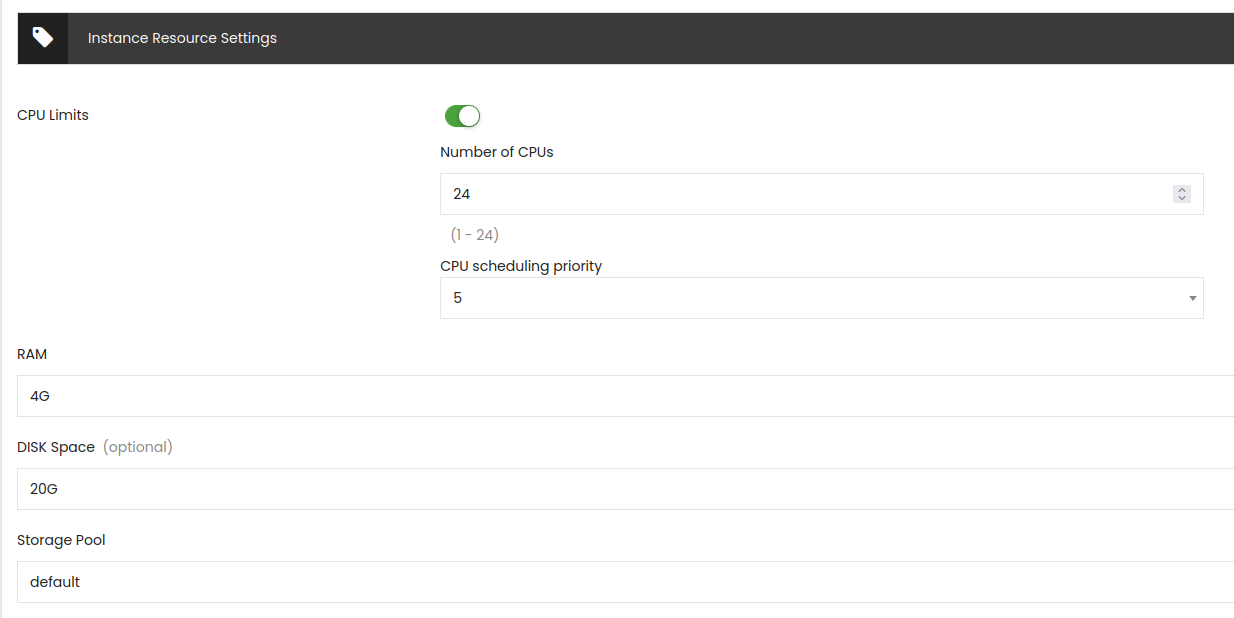
CPU Limits: This allows you to restrict how many CPU cores the instance may use and with which priority it has access to those cores.
RAM: Allows you to specify how much RAM the instance may use at the most.
Disk Space: Defines how much disk space the instance may use.
Storage Pool: Defines which storage pool the instance uses to store its data (config files, logs, snapshots, backups and rootfs). The "default" storage pool is located here on your Aventurin{e} 6110R: /home/incus/storage-pools/default/ - But you can create additional storage pools if need be and can specify where you want them to be located.
Instance Network Settings:
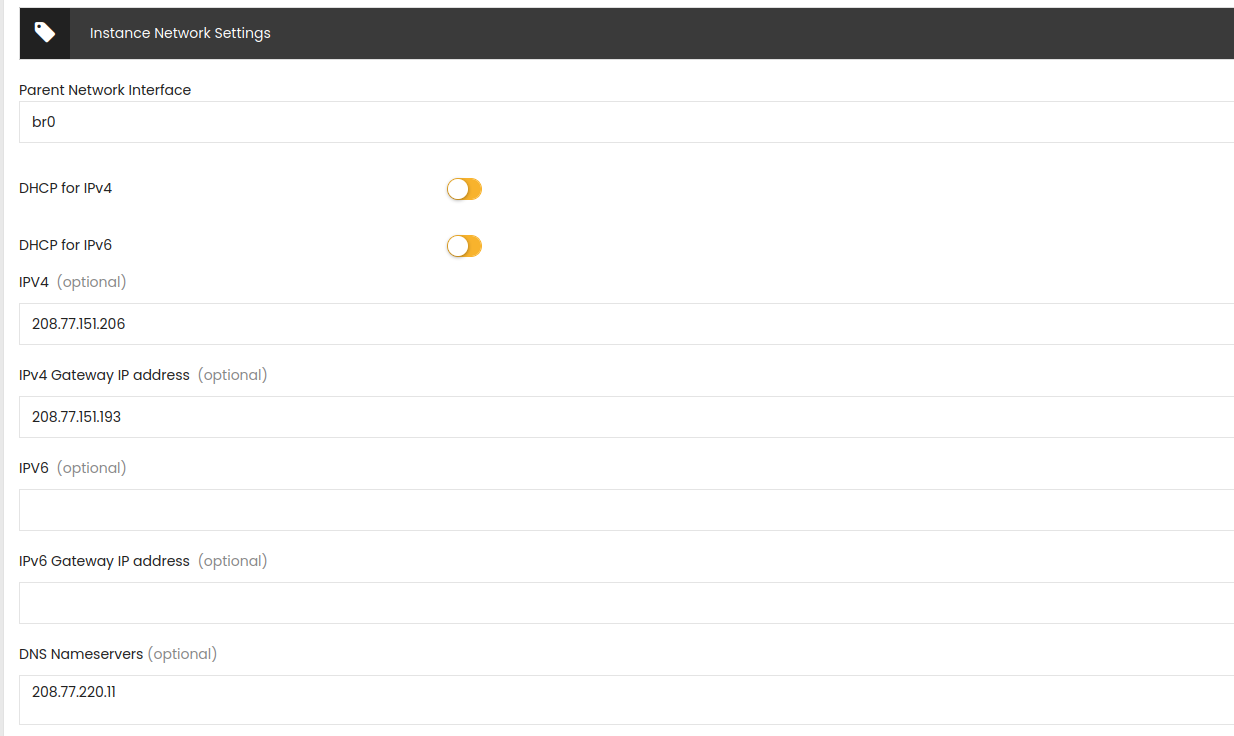
This part should be pretty self explanatory. Here you can configure the network settings of your Incus instance. The only part that requires proper explanation is perhaps this:
Parent Network Interface: By default it will give you two options: "br0" (if your BlueOnyx 5211R is has "Bridged Network" enabled!) or "incusbr0". You can create additional networks of your own choosing under "Incus Management" / "Network", but by default you should have "br0" and "incusbr0".
The "incusbr0" network is a private network with enabled DHCP for IPv4 and IPv6. Instances that are bound to "incusbr0" are NOT available from the outside of your virtualization node. They run on this internal "incusbr0" network unless you set up routing or forwarding yourself. Either via Incus, or by any other means. This is great for some internal testing and as a "playground", but not for much more.
If you want to make instances available from the outside, the easiest and most comfortable way is to bind them to "br0". And that's why this is the presented default option on the instance creation page.
Network settings selected and configured here will be saved to /etc/systemd/network/eth0.network (Systemd-Networkd configuration) and to /etc/NetworkManager/system-connections/eth0.nmconnection (NetworkManager) in the instance. Additionally a could-config will be written into the instance and if it is of type "cloud", then this config will be applied on first boot of the instance
Please note: Almost all instances use Systemd-Networkd as network manager. The only exceptions are RHEL clones, such as AlmaLinux, RockyLinux and (of course) BlueOnyx 5210R and BlueOnyx 5211R.
Instance Network Security Settings:
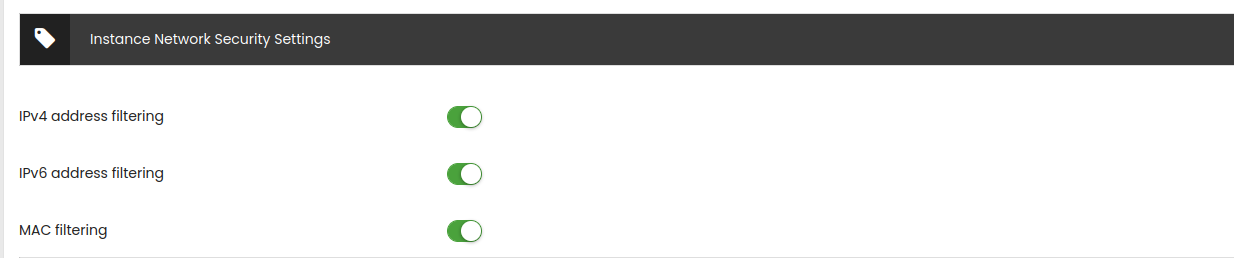
Please pay attention to this important part: These settings allow you to lock down the network of instances and these settings are enabled by default. You can turn them off, but you should not.
IPv4 address filtering: This prevents the instance from spoofing another instances IPv4 IP address. Can only be used if MAC filtering is enabled as well.
IPv6 address filtering: This prevents the instance from spoofing another instances IPv6 IP address. Can only be used if MAC filtering is enabled as well.
MAC filtering: Prevents the instance from spoofing another instances MAC address.
You need to enable all three. You cannot have one without the other. And if all three are enabled, an IPv6 IP address MUST be specified. If you do not specify an IPv6 IP address, then the GUI will auto-assign an (internal and non-routable) random IPv6 IP address.
If these settings are NOT enabled, then a malicious client with "root" access to this Instance could willy-nilly change the network settings of his instance. If he points it to the IP address of another client's instance? Then he could intercept traffic not destined to him.
If all three options are enabled? Then the instance will only ever receive traffic that it is supposed to get. IP address changes inside the instance have no effect and might (at the best) just make the instance itself loose network connectivity. So best procedure is to have all these three options enabled at all times.
Instance Profile Assignments:
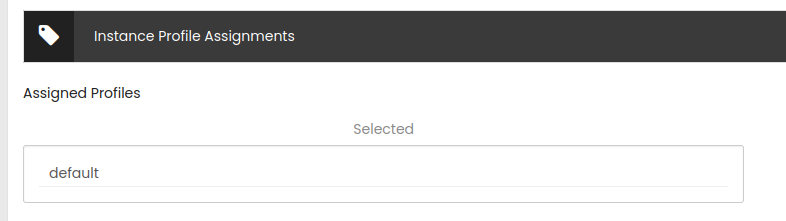
Profiles are configuration snippets that can be created under "Incus Management" / "Profiles" to share config options between instances. Or to set up special usage case configuration options that you selectively want to apply to certain instances. You can then assign them to individual instances via this selector.
Create the Instance:

Once you have filled in all required items, simply hit the save button. If the selected instace image has already been downloaded, then the creation of the instance should be fairly quick. If the image needs to be downloaded first? Then it may take a moment. On the average the instance images are 500-600MB in size.
When the task is done, the instance should show up in the Instance list:
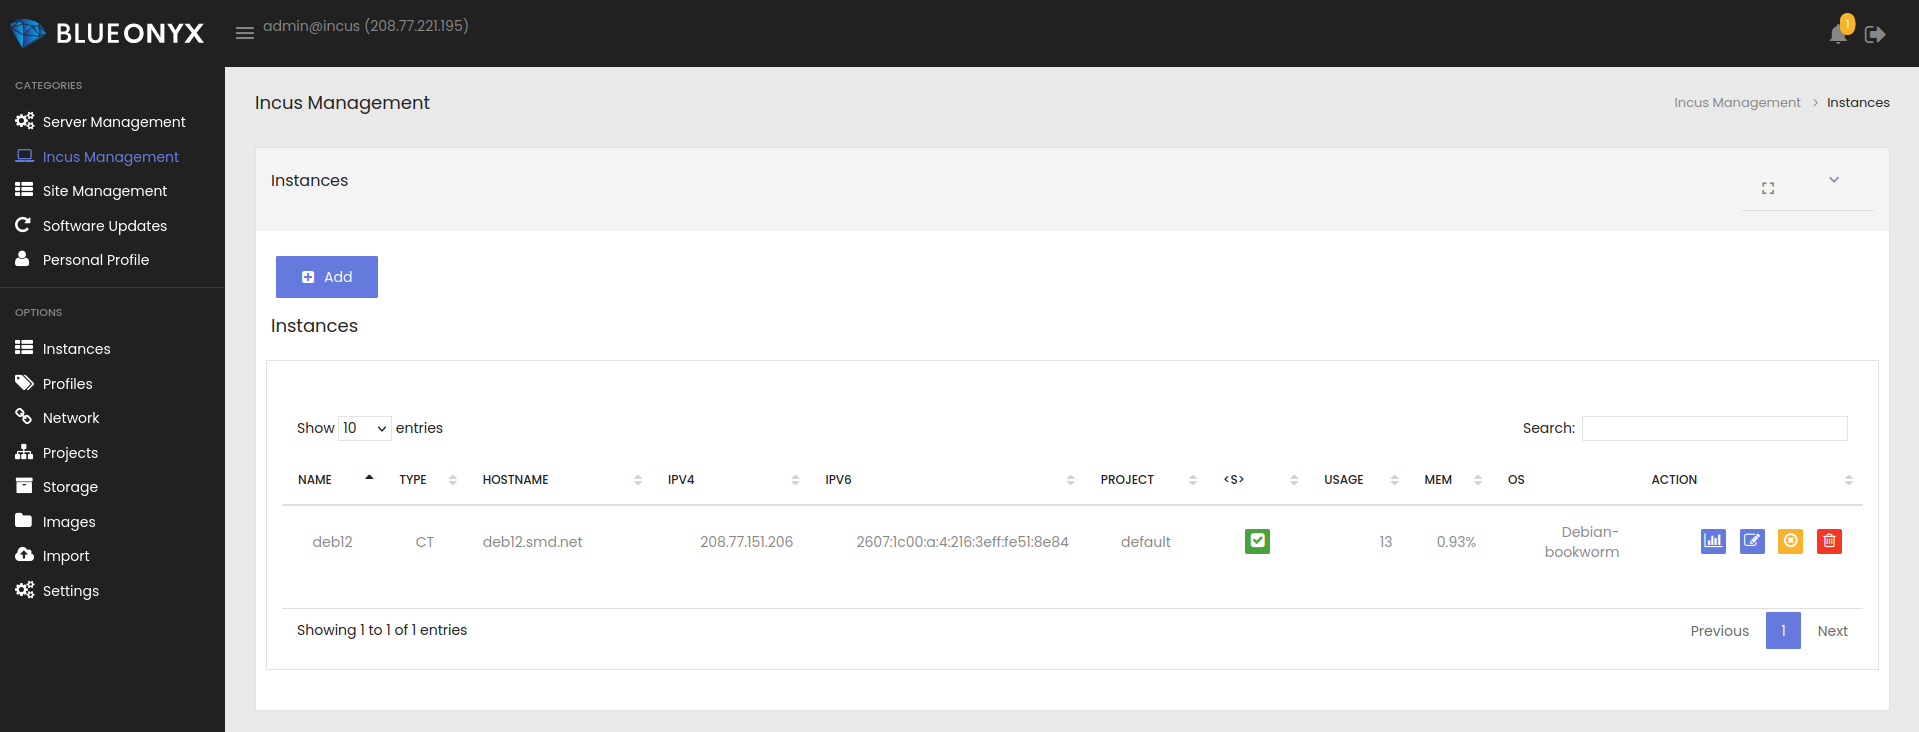
The four buttons on the right? The first one will load the statistics of the instance. The second will lead to the instance configuration. The third button allows to stop a running instance or to start a stopped instance. And the red one? Unless the instance has "delete protection" enabled you can delete the instance from here.
Now that the first instance is running, you may want to continue to the Instance Management documentation.